Saturday, September 19, 2009
Thursday, September 17, 2009
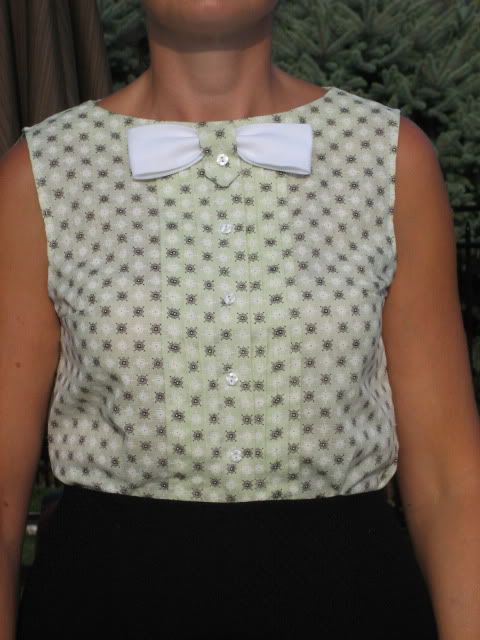
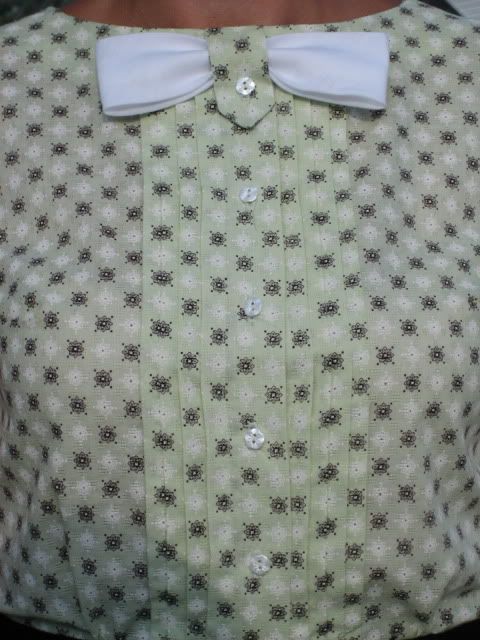
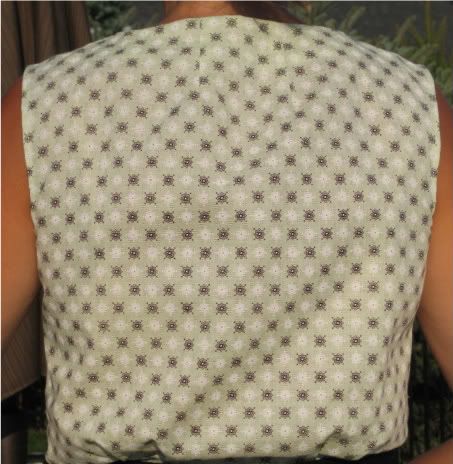
Finally - The Blouse!
Yep, I finished it last week! With all of the landscaping, back to school activity, etc., DH hasn't had time to take any pictures of me in the blouse.
So I took some pictures this afternoon. The lovely Doris was kind enough to model for me, with the condition that she could hang out by the pool for a while and get some fresh air. It seemed a reasonable request to me. As soon as I get pics of me wearing it, I'll post them! 

Despite this project taking longer than I'd expected, I'm pretty happy with the result. I've got that pretty, feminine blouse that I wanted.
So I took some pictures this afternoon. The lovely Doris was kind enough to model for me, with the condition that she could hang out by the pool for a while and get some fresh air. It seemed a reasonable request to me. As soon as I get pics of me wearing it, I'll post them!
In the end, I had to cut out some of the armscye, 3/8" from the bottom (at the side seam), taping to the front and back about where the notches sit. Since I didn't have enough fabric to make more bias binding, I just narrow hemmed it. However, I think I may at some point take that out and make neutral/nude bias strips when I pick up an appropriate fabric. I think it will just lay nicer.
In the meantime, I've been working on my youngest son's Halloween costume, a vampire ensemble. But I've got the bug to sew some autumn or winter vintage garments with some of the gorgeous woolens that were in Louise's haul from the May 23 auction... hmmm, I'll have to rummage a bit.
Sunday, September 6, 2009
Just Around the Corner
Halloween is just around the corner!
I measured the width and depth of the mantle itself, then added extra for the seam allowance. There wasn't enough length to cut the top/bottom pieces in one so there is a center seam. Using one of these pieces as a pattern, I cut a piece of quilting batting. The batting was basted to the bottom fabric.

I love Halloween and I sew all of the costumes each year for my family.
I also enjoy making decorative items for around the house. Since the pool landscaping has kind of taken over... and I need to make some fitting adjustments to the armscye on my vintage blouse... I thought I'd work on a fun, simple project in between all of the other stuff.
For years I've wanted a Halloween fireplace mantle scarf, but always seem to have run out of time by the time Halloween came around. I even went so far last year as to design and cut out a pattern piece!
So I pulled out the Halloween quilting fabrics from stash. I stored my "pattern" piece with these fabrics and got to work on the mantle scarf. It was so simple and quick once I got going!
I then cut two pieces of fabric for each of the large pendants. I sewed them right sides together, leaving the top open to turn... then I pressed each pendant. I alternated an orange pendant (with the witch/cat pattern) with a yellow pendant.
After all of the pendants were sewn, I spaced them out evenly beginning with middle and end one, leaving equal space inbetween each pendant. Then I made the little black pendants using the same fabric as the base pieces. I actually used the tab pattern piece from my vintage blouse, only enlarged it! It was exactly the shape I wanted!
I sewed the little pendants together the same as the large pendants. Then I pinned them in the spaces between the large pendants. Then I basted the pendants in place all the way around.
Finally, I sewed the top and bottom pieces right sides together (being careful to keep pendants away from seams as they were on the inside while doing this step). I left a three inch opening for turning.
Prior to turning right side out I clipped the corner to make sure they pushed out nice and square. Then I simply slip stitched the opening on the back.
After it was finished, I pressed it out.
I love the look of these fabrics together. They have that old fashioned, vintage feel. The fabric with the witch/cat print is at least seven years old and is from Northcott. The black with gold specs may also be Northcott, but I'm not sure. All the fabrics were purchased from a lovely quilt shop in England (when I lived there) called The Bramble Patch, which is in Weedon.
Now that I finally made this, I can hopefully get that darn vintage blouse finished this week!
Tuesday, August 25, 2009
The Moral of the Story Is...
...don't sew when you are in a rush.
This is easier said than done and not always realistic. I've said it many times to myself. But do I listen???
The reason I bring this up is that last night, I finally made it back into my sewing room to work on my lovely vintage blouse! Yay! I was trying to get the blouse finished before my MIL came to visit, but despite my best efforts, I ran out of time. You may recall, I had some issues with the neck facings.
After re-acclimating myself to the project and what needed to be done, I merrily set off with my seam ripper to redo the facing seams and the 1/4" hem.
When that was finished, I pinned the facing to the blouse. It still didn't line up. I was determined, however, stretching and easing the darn thing until the facing was in. I then sewed it on.
Well THEN I realized that the front self facing edge overlapped incorrectly at the top edge, when folded back into place. It left a large, exposed wad of folds on the top edge. What did I do wrong?
I was stumped. This blouse is the first button front I've made without a collar. I thought it would be easier! I started to think something was wrong with the instructions, something I've not really (seriously) encountered in a vintage pattern.
However, the light went off when I re-read the directions again. IT WAS ME and I felt an odd sense of relief!!!!! Finally I comprehended what I did wrong.
First, the *mistake* I made before setting this project down last month was not a mistake! The facing seams ARE 5/8"... so I needed to once again redo those seams!! Gah!
Second, I figured out how the front edge/facing seams were done. If I had bothered to pay closer attention to the pattern illustration, I would have seen how the front edge of the neck facing is sewn to the front self facing of the blouse. **A further clue is in the notches on both pieces and that the notches are marked #5 on the tissue pattern pieces (I love vintage patterns!)
Third, after seam #5 is sewn, the front self facing is folded back (right sides together); then the neckline facing and blouse edges all line up nicely. THEN you sew the seam and turn right side out. Voila!
I figured that out last night, but decided to sleep on it before making another gaff.
I'm happy to report that this morning, all of the above steps were executed smoothly, without incident. I then proceeded to clip, press and understitch the facing beautifully into place.
Below are pictures of the instructions and the facing construction prior to sewing.
Remember, don't sew when in a rush!!!!!!

Wednesday, August 19, 2009
Pattern Grading
Today while catching up on my sewing and vintage *stuff*, I came across a great article I've seen before in Threads Magazine about pattern grading. It's called Making Sense of Pattern Grading.
Although it wasn't written specifically for vintage use, I think it's particularly relevant to us vintage enthusiasts. If you all are anything like me, you have at least one (or ten or a hundred) awesome patterns that are not your size, but that you just couldn't live without!
So I thought that I'd post a link here to the article on the Threads website for easy reference. You are now liberated - don't let the wrong pattern size stop you ever again!
http://www.threadsmagazine.com/item/4368/making-sense-of-pattern-grading
Although it wasn't written specifically for vintage use, I think it's particularly relevant to us vintage enthusiasts. If you all are anything like me, you have at least one (or ten or a hundred) awesome patterns that are not your size, but that you just couldn't live without!
So I thought that I'd post a link here to the article on the Threads website for easy reference. You are now liberated - don't let the wrong pattern size stop you ever again!
http://www.threadsmagazine.com/item/4368/making-sense-of-pattern-grading
Tuesday, August 18, 2009
Trying to Get Organized!
It's been nutty here the last few weeks! My mother-in-law left yesterday after a two and a half week visit. During this time, I had my family visiting twice to visit MIL, the on-going pool construction, my little guy's birthday and the kids went back to school today.
I'm exhausted!
BUT, the sewing room is calling me. I will get back to my sewing tomorrow or Thursday! I hope everybody has been more productive than I have been!
Stay tuned.
I'm exhausted!
BUT, the sewing room is calling me. I will get back to my sewing tomorrow or Thursday! I hope everybody has been more productive than I have been!
Stay tuned.
Monday, August 3, 2009
Beautiful Embroidery - Is it Vintage?
My poor blouse, which I envisioned "whipping" out in a couple of days, is patiently waiting again. I made a mistake on the facing (required 1/4" seams and I made 5/8"...).
THEN my MIL arrived from England on Thursday and will be staying with us until August 17. Combine that with the on-going construction of the pool and, well, there hasn't been much time for sewing.


I'd be extremely grateful if anybody can play detective and has any idea if these are Feltman Brothers garments and if they can be dated.


THEN my MIL arrived from England on Thursday and will be staying with us until August 17. Combine that with the on-going construction of the pool and, well, there hasn't been much time for sewing.
Nevertheless, MIL is a big fan of auction like DH and myself. So on Saturday we attended a local one and came home with some goodies. I got a box of fabric; overall, it was ho-hum with the exception of a gorgeous fine woolen and a nice piece of silk. There is also a nice length of red, white and blue striped cotton.
But what I really love from this haul are some fine baby garments. I *think* they are vintage and upon researching, I *think* they are Feltman brothers.
The dresses and vests are made from fine voile and batiste with exquisite hand embroidery and teeny-tiny tucks. (Ironic since I'm working on a blouse with tucks!). The baby gowns are from cotton flannel, also with the same high quality hand embroidery. All garments are French seamed. There are two vests, two dresses and five gowns (two pink embroidery and three blue embroidery).
There are labels on only two of the items, the two vests. They say "Hand Made in the Phillippeans Size 1 Year".
I was thinking of selling them, but I've changed my mind. I'm holding on to them for future grandchildren (It really is future: my boys are 8 and 11 !)
Subscribe to:
Posts (Atom)