I firmly fall into the "I am" category. My latest project is a 1950's apron. It has four varions.
It's easy to assume that I bought it for the full, bib style, which is very eye catching. But I didn't. I *will* make that one eventually, but it was View 3, the one with the overlapping pockets, that caught my fancy.

The fabrics that I'm using have been in my stash for a couple of years. One of them is an ivory cotton/linen blend with periwinkle blue embroidered flowers. The other is a 100% linen periwinkle. I originally bought the solid linen then grabbed the ivory some time later when I saw it. The embroidered blue flowers were a great match for plain, blue linen. I would have passed it by otherwise.

It was alway my intention that these two fabrics be used together; however, on what has eluded me... until I saw this pattern. The ivory fabric was made with a border along the bottom edge, just perfect for an apron!
In the spirit of creative apronry (I think I've invented a word), I'm attempting to make it more interesting. I'll use the blue linen for the pockets, waistband and ties. The overlapping pockets are a fun feature, but on their own, they are kind of boring. I'm going to embellish them by making an applique from the flowers on the ivory pocket.
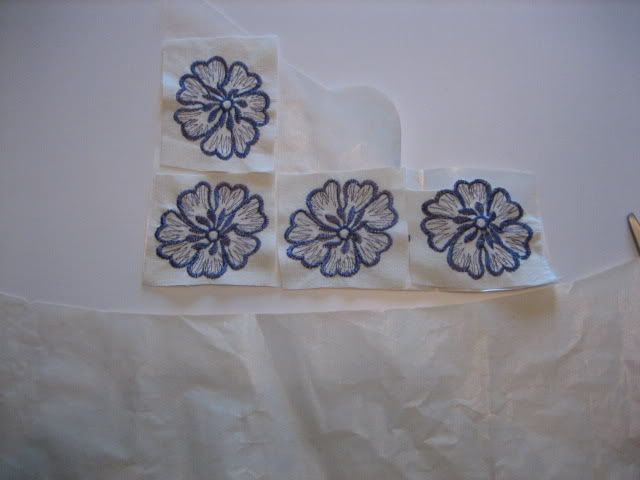
Making an applique isn't difficult, it just takes a little extra time. First, I cut out a square with the flowers in the middle. They were then fused onto paper-back, two sided interfacing. After fusing, the paper is left on and cut around the design. I will then peel off the paper and fuse it onto the pocket, then stitch in place.

However, before attaching the appliques, I wanted to be sure the placement was right. So I stitched the top facing down and sewed the bias tape around the pockets' edges.
I conveniently had matching double fold bias tape. (At one point I was going to make a Renaissance outfit from this fabric...) With the curve of the pockets, I took my time to assure that the bias tape was sewn on evenly and smoothly.
Getting bias tape to lay smoothly around curves isn't difficult. It's what it's supposed to do, but can be frustrating if you've not done it before. All you need to do is work a little bit at a time and press as you go.
Starting at the top edge, place the fabric inside the tape so that it hits the fold. Pin. Move ahead and repeat. As you come to the curve, work a little ahead so that the tape is distributed evenly around the curve.
 Use the tip of your iron and press a tiny bit at a time, working from the outside in. Any puckers will smooth out. That's the beauty of bias tape. Then pin in place. Don't be afraid to use as many pins needed to keep the curve flat and the fabric in place.
Work all the way around then you're ready sew! After sewing, go back and press again. Voila!

I hope that this apron turns out nicely. Ladies back in the day took pride in their aprons. I want mine to do them justice. Fingers crossed!
4 comments:
I cant wait to see how it turns out that fabric is adorable.
xo Darla
I can't wait either
I like the way the pocket turned out, very neat indeed.
I appreciate nice craftsmanship
Thanks for the binding tutorial. I haven't used bias tape in a long time so this is good for me to check out. Your dresses are georgeous!
I am definitely an apron person. :D Looks like your apron is going to be darling! I can't wait to see the finished product!
Post a Comment